Monday, June 22, 2020

Pinch Pot Planters

pinch pot planter
Pinch Pot Planter, Coloured with Iron Oxide

Making a pinch pot planter is a fun ceramic project whether you are a well seasoned potter, or a beginner.  Planters are a great addition to both indoor and outdoor spaces, and make lovely gifts. 
Here are some things to consider as you work on your planter design. 

Questions to answer before you begin…..


 What type of plant will go into your planter?


pinch pot planter
Planter on top of a fence post around the chicken run.
Knowing the type of plant you plan on placing in the planter will help with the design. 

Will the plant be part of the planter’s design?  Some plants hang down, some plants are tall and spiky. The planter to the left was designed specifically to hold a hen and chick succulent. The leaf shape is mirrored in the feathers on the birds head.  Think about what kind of plant will complement your design and vise versa. 

Will the planter hold an indoor or outdoor plant? An indoor planter may or may not have drainage holes for water.  An outdoor plant will absolutely need a drainage hole, to keep the plant from being over watered when it rains.  

Can the plant live in a container without a drain hole, or will it need to sit on a tray?

Some plants are not picky about their watering, but others don't like to be under watered or over watered.  If you feel your plant will need a tray underneath it to catch excess water, consider working the tray into your over all design. 

The planter at the top of the page was designed to be outdoors on a fence post.  It has a water hole worked into the design of the beak.  When it is finally in place...hopefully someday...the excess rainwater will drain out the beak.  


How will your planter be displayed? 

Will the planter sit on a surface and if so, will it sit flat or be elevated on legs? When a planter sits flat on a surface, the bottom of the planter needs to also be flat.  If there is not a sturdy flat bottom, the planter may become wobbly and easy to knock over once the dirt and plant have been added.  The addition of legs is great way to add visual interest.  Three legs tend to be more sturdy than 4. If you are adding 4 legs, but want the stability of 3 legs, you can purposefully make one of the legs raised, as if it is in motion.  Remember, legs should be attached firmly, as legs have a tendency to detach during firing. 
pinch pot planter
Planter made by my daughter...and thriving plant thanks to her green thumb. 

Will the planter hang on a wall? A plant is a beautiful addition to an inside or outside wall.  How the planter will hang on the wall needs to be carefully considered during the planning phase.  You will need to make sure the planter is easy to hang, even once the dirt and plant have been placed inside. 
                
Will the planter be suspended from a string? I am quite fond of plants hanging in a window. It is important to consider the string during the design phase.  A watered plant in a ceramic pot can be surprisingly heavy.  You need to be certain the string will hold. The planter shown above was designed to hung, however the sting snapped after the plant had been established and has proven to be too tricky to add a new string.  However, the plant is happy enough to flower and is quite lovely. 


Will the planter be incorporated into another object?


pinch pot planterpinch pot planterDesigning planters as parts outdoor sculptures can be a creative way to add more plants to outdoor spaces.  Planters also can be added to the tops of fence posts, or the tops of rock walls. 

If you plan on adding your planter to another object, it is very important to consider how the two objects will connect.  It is so much easier to thinking about these things in the planning phase, rather than back peddling during the building phase. 


What type of pinch pot will best suit your design?

pinch pot planter
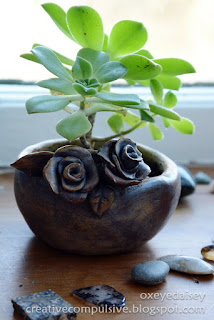
Pinch pot with roses made by my daughter
Will a normal pinch pot do, or do you need to make a "potato" (a hollow ball)? 

Some designs will work great with your run of the mill pinch pot.  However, if you are adding things to the base pot, like a head, or large beak, or building something tall, consider using a "potato."  

pinch pot planter
Blue Musk Ox made from a "potato"
A potato is two pinch pots, of the same circumference that have been placed together to form a sturdy hollow ball.  The pressure created by the air trapped on the inside of the hollow ball makes a very sturdy structure, even in fresh clay.  Once a hole has been made in the ball, and the air pressure released, the sturdiness is lost.  If you are working with a potato, wait until the pot is leather hard before making a hole in the potato.   

pinch pot planter
Texture made from lace.

How will you finish your planter?


What textures do you find appealing? Texture can be a fun way to add a little pizzazz to a simple plant pot. Textures are beautiful with an oxide or underglaze rubbed into the recesses. 

In the design phase, it is good practice to think about how you will finish your pot. How will your planter sit on the kiln shelf? What parts of the planter will be glazed? Will you use underglazes? Will you use oxides?

 Once you have answered these questions for yourself….SKETCH YOUR DESIGN!


Here is a link to a Pinterest board with more examples. 


Friday, April 24, 2020

Kirigami, Too!


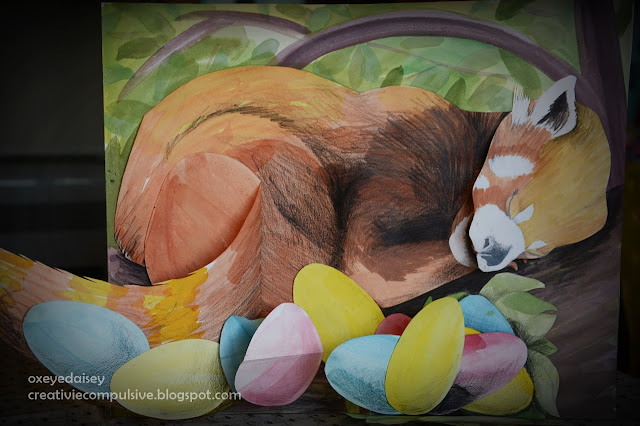
After making my first Kirigami video, I finished this very large birthday card for my daughter.  It's an Easter themed Red Panda Birthday Card.  Below is a video where you can see how to the simple techniques I discussed in the first video can be used to create something much more interesting!


Zoo Animal Masks: Part III, Red Panda


red panda mask

Edit: I found this unpublished blog post from a couple of years ago and thought I would finish the zoo mask series.

I recently had the opportunity to participate in a Zoo Animal themed exhibition.  These masks were made from reference photos taken at our local zoo in Wellington, NZ.  I love to see the red panda sleeping in the large pohutukawa trees at the Wellington Zoo.  One of the masks is a realistic interpretation of a red panda, the other is a "New Wave" inspired red panda.

red panda mask


Wednesday, April 8, 2020

Kirigami Keeps Popping UP!

Pop-up art


Kirigami is the Japanese art of cutting and folding paper, but you may know it better as the art of making pop-up art, seen in greeting cards and children's books.  Practicing Kirigami provides hours of fun and fascination ...and sometimes a touch of frustration, but isn't that the case with most new skills?

I created a video demonstrating 4 of the basic Kirigami techniques, the Parallel Fold, the Angle Fold, the Top Edge Pop-up, and the Rotation. Additionally you will find a link where you can download the templates I use in the video.  There are additional templates in the PDF you can use as a challenge.
Alternatively, you can create your own templates using the images found below the video.

These mechanics can be used to create everything from straight forward, simple projects, to intricate complex projects.

Download PDF Templates Here


pop-up art

 Tips for Parallel Folds:

* When making a card, make sure your folds will fit inside the card when it is closed.  Keep the distance of the fold from the center fold of the card no more than half the width of each side of the card.
* Change the shapes of the cut edge.
* Add shapes onto the surfaces that pop-up.
* Use a craft knife and cut shapes into the
surfaces that pop-up.
*Add a different colour of paper underneath. 


pop-up art Tips for Angle Folds:

* Play around with what will fit inside the card, using some scrap paper. This can take some trial and error.
* Shapes can be added to the inside of the cone, again, just play around until the card will fold properly.
* Shapes can be added to the outside of the folded surface.  Shapes added here will look like they move at a diagonal when the card opens. 


pop-up art
Tips for Top Edge Pop-ups:

* Try changing the angle where your shape meets the top edge of the paper.
* Making sure your shape fits into the card takes, you guessed it....trial and error.


pop-up art Tips for Rotations:

* Rotations are based on using two circles.  The final shapes can be varied as long at the two shapes keep the original alignment.
*  The top shape must sit perpendicular to the center fold when the card is open.
*   The two shapes must maintain the dimensions of the original circle and align at 22.5 degrees from the center fold of the card, in the sample this is where the tabs are located.


You can see a card that uses all of these kirigami techniques HERE

Monday, October 22, 2018

Halloween Graveyard

Halloween Tombstone
Halloween Tombstone
As a Southern Hemisphere transplant, I find getting into the Halloween spirit very difficult.  Halloween in Spring is just weird, no pumpkins, no autumn leaves, no frosty nip in the air.  This year my daughter decided she would stand for my Bah Humbug Halloween attitude no more!  She set about making Halloween decorations mid-September and shows no sign of slowing down.  She has absolutely insisted that everyone in the family help out, at least a little.  Whereas the tombstones are about 90% her work, and she has put A TON of work into them, each family member has contributed.  That contribution, regardless of size has helped all of us get excited about Halloween....in fact, there may be some really big plans in the works now.
 
Halloween Tombstone
Halloween Tombstone

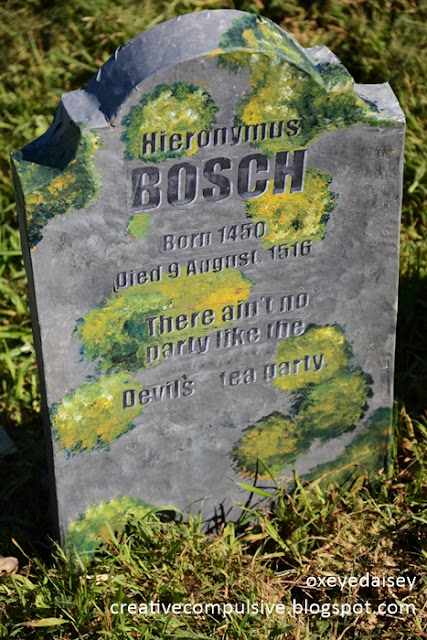
The tombstones are made of 4 layers of a medium weight paper board, lots of tape, a couple of layers of papier-mâché and acrylic paint.  Many, many hours were spent waiting for all the different layers to dry. 

Brom Tombstone
Halloween Tombstone

At diner one evening my daughter asked everyone to write down suggestions for tombstone names.  She read out all of the suggestions and we settled on choosing one suggestion from each member of the family.  It was a very entertaining diner! 

Hieronymus Bosch Tombstone
Halloween Tombstone

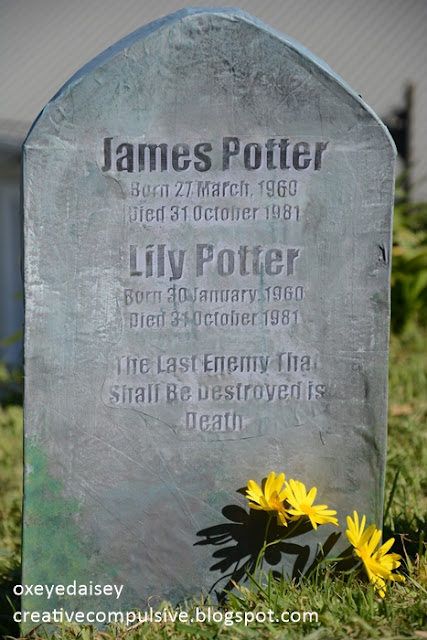
Once the laborious task of assembling was finished, the tombstones received a base coat of paint. Next, the writing was added. The names and epitaphs were written in Photoshop, with some simple shading added with a Bevel & Emboss Layer Style, and printed on plain paper.  Finally, touch up paint was added to blend the paper with the rest of the tombstone. 

James and Lily Potter Tombstone
Halloween Tombstone
There are two holes in the bottom of each tombstone, just big enough for a bamboo stick to fit inside.  I cut bamboo sticks about 30 cm taller than the tombstones and hammered the sticks into the ground.  The tombstones fit over the sticks. 

So, next weekend she has plans to hang a giant papier-mâché skull from a gigantic spider web....  

Halloween Tombstone
Halloween Tombstone 


Thursday, October 11, 2018

Masks and Hoodies


Wolf Mask Hoodie
Every Halloween I gets questions from well meaning parents wishing to make masks for infants and toddlers.  It has been my experience that very young children do not like things on their face, even a beautifully crafted mask. However, I think I've found a solution that will make both parents and children happy this Halloween!

I added a wolf mask to the front edge of a hoodie, and the result was quite delightful!  My lovely model was 4 and could probably wouldn't mind wearing a mask, but really enjoyed the hoodie. 

Wolf Mask Hoodie
I stitched eyes that consisted of 3 concentric circles to a white background. After the eyes were stitched, I simply added them to the back of the mask.  If I had this plan in mind from the beginning, I would have not cut the eye holes in the base mask and added the eyes earlier in the process.  Because the muzzle can be a bit floppy I added a couple more layers of felt to the muzzle. 

Wolf Mask Hoodie
 
The mask is attached to the hoodie at the center front, between the two ears.  It is attached on the lower edge of the hood.  The mask is also attached on the sides between the two points on the wolf's cheek.
Wolf Mask Hoodie

The whole process took only slightly longer than making the mask, as stitching around the eyes did take a little while, but the effect was well worth it!  

Wolf Mask Hoodie

Monday, March 13, 2017

Sock Monsters....what happens after the socks go missing.


There is always that one sock that has lost its mate forever, destine to live solo at the bottom of the sock drawer, or your favorite socks that have the unfortunate fate of becoming holey. Good-bye lonely and holey socks, Hello, Prisco-37!  Made from a wool sock I bought at an Italian market many moons ago and a cotton sock on permanent loan from my son, Prisco-37 is a sample for an up coming workshop I'm teaching at Vincents Art Workshop in Wellington.   


 I love his little nose....

  
The glamorous reality of taking photos for the internet......