Saturday, January 4, 2014

Potato Print Snow People


So, my New Year's Resolution is to "finish unfinished projects," and I am careful not to say, "ALL unfinished projects," or "to not start new projects until the old projects are finished"...but, simply to finish unfinished projects. I wanted to finish these snow people before Christmas...last year. I found them today when I was looking for something else entirely. They seemed like a perfect candidate for realizing the resolution.

These are so fun and easy....

I began with black cotton velveteen rectangles. Why cotton velveteen? Well, I had just finished a holiday dress and it was handy.  Most any fabric would work, but I like the look of something with a nap and the black was a good contrast to the white of the snow people.

Next, cut some potatoes in half, I wish I had a picture, but really, this was a year ago, and I think you can handle a mental picture of a potato cut in half.  Then, dipped the cut side of said potato in white fabric paint mixed with a little glitter paint...the glitter is very important.  Press the potato paint side down on to the fabric to begin "building" snow people.  Doing a test run is highly recommended, you do need to apply a fair amount of pressure to the potato.  Making the potato print is great fun for all ages, definitely enlist the help of a wee one or two, if they are around.

After the snow people are dry...probably 24 hours or so...begin sewing features on to the snow people, to personalize them.  This part was a big hit with the younger crowd, sorting through and picking out beads and buttons, how could it not be fun? My lovely assistant did a smashing job.


I cut up some holey shirts to use for the hats and scarves (once upon a time, that red scarf was my favorite shirt).  The hems of the shirts make perfect hat bands. The red hat, on the shortest snow person, is from the sleeve an old sweater.


Here is how to tie the scarves...


First, with right sides together, sew two scarf halves on either side of the head.


After the scarf halves were sewn down, tie a simple knot.  To finish, tack the knot down.

At this point I let the project sit for about 13 months....it helps the paint cure...not really, but if it helps,
you can tell yourself that.

Finally, find the project buried in a pile of unfinished projects, and turn the neglected, but still adorable snow people in to incredibly handsome pillows.  And don't worry, snow people aren't just for Christmas...Winter has barely begun here in the Northern Hemisphere...Go forth and make snow people....


...make a whole snow family...


....or just one rogue snow dude in red boots...it's SNOW much fun!  

Wednesday, January 1, 2014

The Last Project of 2013

t-shirt quilt
I started a t-shirt quilt in April, as a sample for a class I was teaching.  It was suppose to be fast, fun, and finished a very long time ago. Those plans hit a snag right away...ironing the Pellon interfacing on the the backs of the t-shirt is neither fun, nor fast...but eventually I did finish.

Once the dread Pellon was on, I did have a lot of fun with the piecing. I added denim saved from holey jeans...denim being the natural complement to the t-shirt. I used the WHOLE t-shirt, not just the fronts...I even used the sleeves. My son has a certain affinity for the Italian flag, so I worked that into the piecing. Though the quilt looks fairly random, it is, for the most part, 18 inch squares.

The plan was to tie the quilt...BUT, as it turns out, I really don't like to tie.  I decided to do a mixture of different "ties." From the beginning the quilt included french knots, traditional ties, and "star" ties. However, even with the variety of ties, I quickly lost my steam and  the project sat for about 5 months.

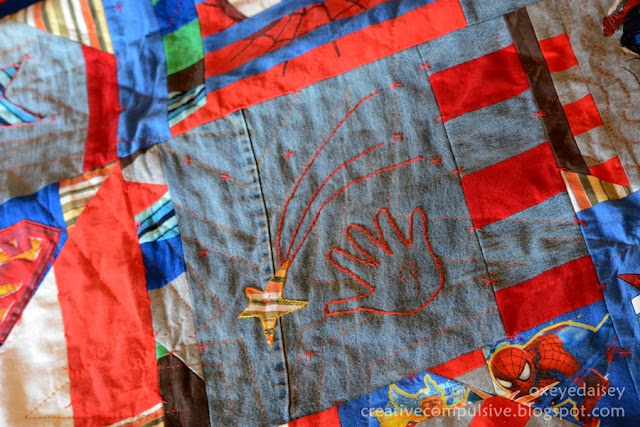
In October I drug the quilt back out again, this time determined to finish.  I added a star, attached with a blanket stitch, and I decided to add my son's hand print, around which I chain-stitched...at this point I was about an eighth of the way done with the quilting, mostly in the bottom left hand corner, and still not very excited.

THEN, while cleaning out the garage, I found a large embroidery hoop I inherited from my grandmother! This was the game changer. I decided to add some hand quilting....and, as insane as it is, I really enjoyed the hand quilting.

I added more stars, more chain stitching, and more of all the ties. The more I did, the more I wanted to do and I fell in love with the project!

t-shirt quilt

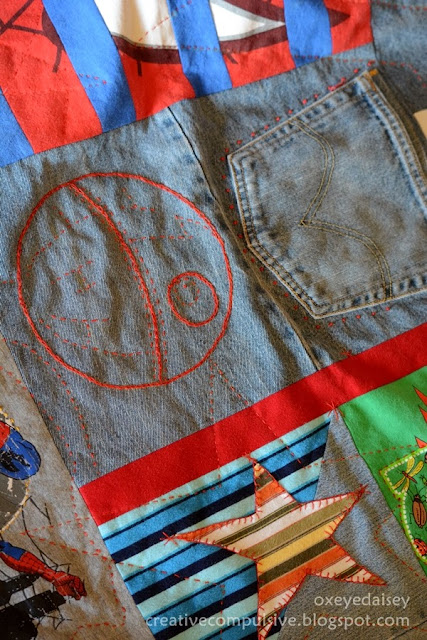
Most of the work I did on the quilt was in the evening after the children were in bed.  One day my son made a suggestion that I add something of Star Wars to the quilt.  I decided to add the Death Star, but kept it a secret.  So the next morning when he woke up, I told him I added a moon to the quilt, just so I could hear him say, "that's no moon!"  He appreciated my humor.

death star

Even though tying is not my favorite, I could not resist adding ties around the mane of the lion.

tee shirt quilt

He is really excited about the pockets on the quilt...one will definitely be used for "Rudolf".

jeans quilt

I finished the binding on the quilt at about 11:55 last night...I really didn't want to have to change the date!

blue jeans quilt
Add caption

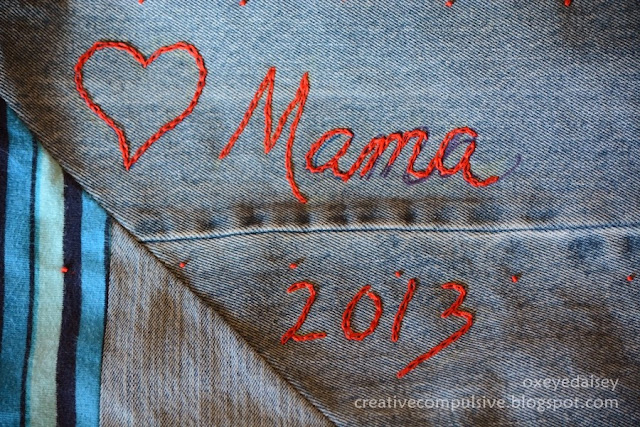
Not to worry, that's washable marker I used to write "Mama".  I haven't washed the quilt yet.  I can't wait to see it when it gets that kind of bumpy, lovely, "quilt" look to it after it has been washed.  One last picture of the back...just so you can see all that handy work....

hand quilting