Wednesday, August 17, 2011

Super Bat Cape

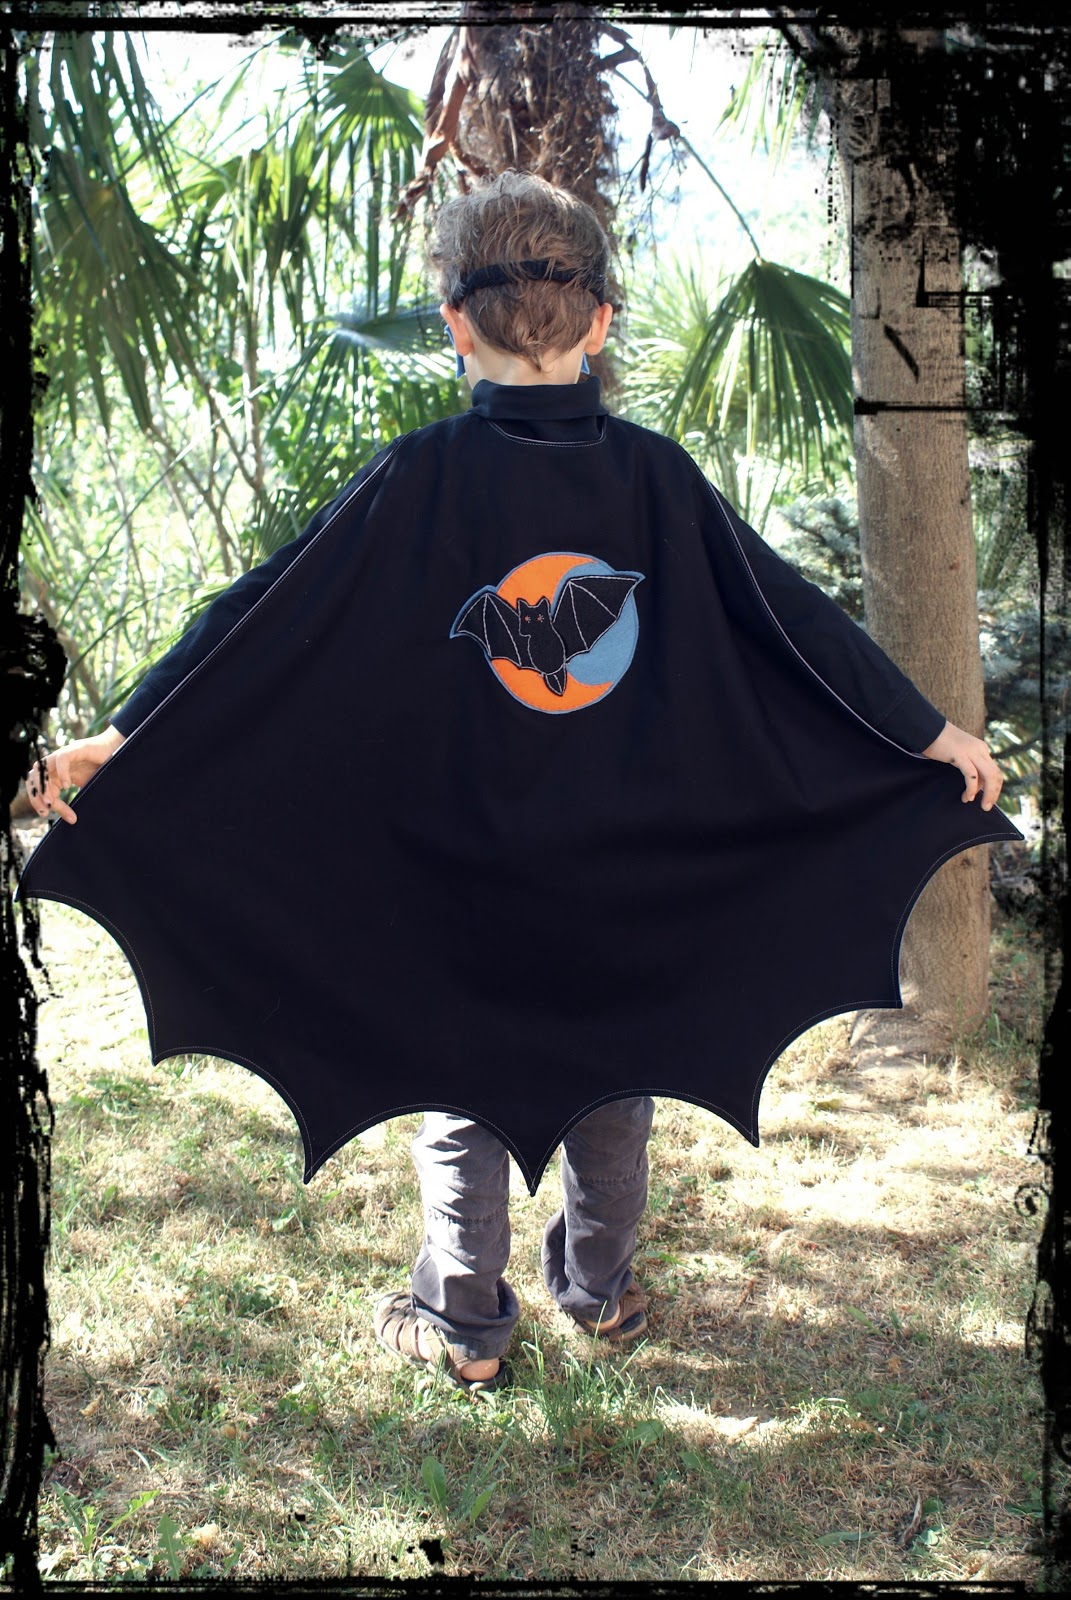
Today we took photos of the Super Bat Cape!  Gearing up for the Super Cape class at the Arts and Crafts Center.  This cape is essentially the same as the Super Cape, but with a scalloped "bat" edge.  I think this cape would be perfect for a vampire, a bat super hero, or a witch.  
Super Bat Cape ready for action!

A lovely silvery gray lining...
a Bat and Crescent Moon on the back emblem.... 

The Masked Super Bat!
 My Super Hero was so ready for action!  So many hours of fun to be had in a cape and mask! 

Monday, August 15, 2011

Super Princess


I just finished this year's sample of the Super Princess Cape and Mask for my upcoming class at the Arts and Crafts Center.  I am so lucky to have such a willing model.  She even helped pick up the box of beads and sequins I spilled all over the floor just so I would hurry up and finish!  
 The Super Princess cape is the Super cape with an added ruffle on the bottom and a heart and flower embellishment at the neck for extra Princess-ness.
the Princess Cape back

the Princess Cape front
On this cape a used a polka-dotted cotton organza for the ruffle and the lining.  Organza is a very sheer fabric so on the lining I actually used two layers, one of the organza and one layer that is the same as the outer fabric.

 All of the capes I have designed have an emblem for the back.   This one got pretty fancy, but appropriate for a Princess!
My Super Princess!

Saturday, August 13, 2011

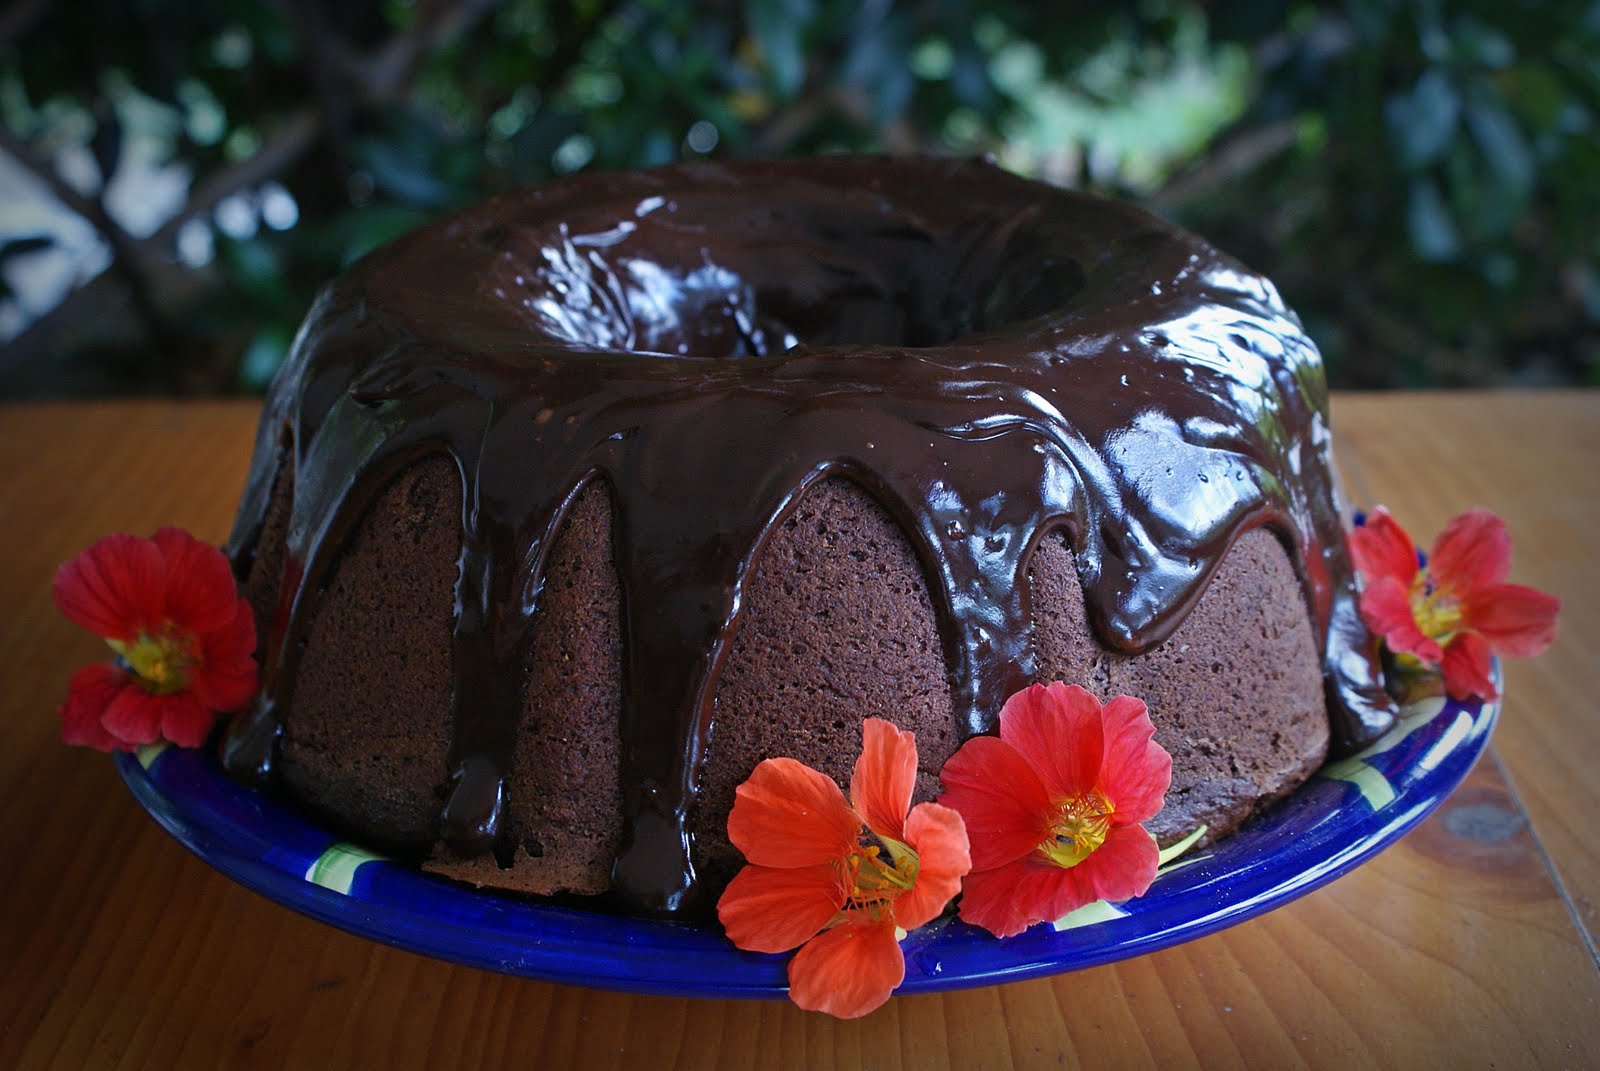
Chocolate Zucchini Cake

My mother started making chocolate zucchini cake when I was a child back in the 80's.  It is a very moist and delicious cake, and a great way to use the over-sized zucchini that tend to appear out of nowhere like magic this time of year.  I make it every Summer.  It has become a hit with both the family and the friends.  Today I made one at the request of my dear friend who is preparing to leave our lovely hilltop for the Azores off the coast of Portugal.   She supplied me with the zucchini (mine never did decide to pick up production), so how could I resist.   I decided to post the recipe.  I have made changes to the recipe several times of the years, and in my humble opinion it is better than ever!


Preheat Oven to 350 F.
Grease and flour pan 9x13 or 2 8inch rounds.
Cream together:
1/2 Cup butter
1 8oz. package of cream cheese
2 Cups of sugar
Then add:
1/2 Cup milk
2 eggs
2 teaspoons vanilla
2 Cups of shredded or otherwise pulverized zucchini
Mix in:
2 1/2 Cups flour (I use half whole wheat and half white, but any combo will work)
1 Cup coco powder
1 teaspoon baking soda
1/2 teaspoon salt
1 Tablespoon baking powder
1 Cup chocolate chips
Bake for 30 to 50 minutes


Today's Bundt Cake Pan Variation: 
increase sugar by 1/2 Cup
increase flour by 1/2 Cup
increase coco powder by 1/4 Cup
increase baking time to 70 minutes

Today's cake was topped with melted chocolate mixed with a splash of milk, and the nasturtiums were added for color.

The cake was good, really good, but like everything in life, better shared with friends.

Monday, August 8, 2011

Garden Flowers, a Pomegranate, and a Tomato

The children helped me dig the last of the potatoes today.  We all had so much fun, it was like a treasure hunt.  In celebration, I decided to make a garden post.  We have had a bountiful garden this year.  My mother helped me do most of the planting in early May.  She spent three months with us and did a lot of work in the garden.  Before my mother arrived the peas were almost ready to be picked and the potatoes, tomatoes, and basil were already in the ground.  Together Mom and I planted green beans, zucchini, lots and lots of cucumbers, eggplant, bieta (an Italian "green"), lettuce, and a healthy heap of flowers, including sunflowers, zinnias, and calendula. Everything has done amazingly well, except for the zucchini.  The zucchini looks pretty, has many flowers, but makes small shriveled zucchini.  It's a little embarrassing.  But, we've made up for it in cucumbers!
When I began sifting through the garden pictures it was not difficult to see what I really like to take pictures of...flowers, tendrils, and insects!  I will start this set out with a picture of Mom in the early May version of the garden, and round things off with a picture my son took of me in the August version of the garden.  
Tonight we dine on boiled new potatoes with green beans, a little onion, and a just a lil' bacon!
Mom and the Garden in May
The Promise of Green Beans
Potato Flowers
Zinnia 
Hummingbird Moth Enjoying the Zinnias
Eggplant Flower
The Beauty and the Beast
Cucumber Flower
Cucumbers in the Setting Sun
Sunflower
Friend of the Bees
Reaching for the Sky
Late Afternoon Sunflower
They Grow like Sunflowers in July. 
Mr. Tomato Head
Pomegranate After the Rain

Look how happy she is just thinking about eating all those wonderful Summer veggies!

Friday, August 5, 2011

Up Coming Classes for Halloween 2011

What is an x-costume designer's favorite time of year?  ....Halloween, of course!  This is my second Halloween teaching classes at the Arts and Crafts Center and last year we had so much FUN!  Samples will be hang soon in the Arts and Crafts Center's window, but in the meantime I have had some inquires as to what exactly we will be making in class.  Here are pictures of last year's samples and a little description about what to expect from each class.  


September 7th and 14th: “Super Capes and Masks” 
Time:  9:30 a.m. – 12:30 p.m
Cost: $30 (plus additional materials; list provided at the Arts and Crafts Center)


This was a great class last year, we ended up running two sessions.  This year I have a lovely lady bug cape and mask, and a super spooky bat cape and mask that will soon be hanging in the Arts and Crafts Center window along with the traditional Super Cape!  We will begin the first session designing masks, so it is a good idea to come to class with the beginnings of a design in mind.  I provide patterns for all of the sample masks, as well as the basic mask shape for you to create a design of your own.  The second session will be devoted to the cape and finishing the mask.  This class was designed as a beginning sewing project.


 September 21st  and  28th: “Little Critter Costume”
  Time: 9:30 a.m. – 12:30 p.m.
  Cost: $30 (plus additional materials; list provided at the Arts and Crafts Center)


I taught last year during the winter, but I am offering it this year at Halloween.  I think these hats make a great costume pieces.  My children loved wearing them all winter, and we still have days, even in the heat of the summer, where they use the hats and tails for some pretend play fun.   My daughter loves to wear the cat hat and tail with a pretty skirt and pretend she is Hello Kitty.  I have patterns for a bear, pig, cat, dinosaur and monkey, but please feel free to be creative!  If you have a different animal in mind we can work together to create it! I think these make wonderful costumes for very young children and infants as they can be paired with comfortable clothing and are not overly cumbersome.     The bonus to this class is learning how to use the "stretch stitch" on the sewing machine, which makes sewing fleece so much easier!


October 5th  and 12th: “No-sew Tutu, Fairy Wand, and Wings”
  Time: 9:30 a.m. – 12:30 p.m.
  Cost: $30 (plus additional materials; list provided at the Arts and Crafts Center)


A very fun and popular class last year, there is so much room for creativity!  The wings are made of craft foam and have proven to be very durable.  The purple pair pictured below I made two years ago and they are played with on a regular basis, in fact yesterday they were on one of my daughter's baby dolls while she was wearing the pink pair.   The wings require no sewing, and the only sewing on the tutu is the optional leaves and petals.  Hot gluing is required, so bring your tough skin!  


October 19th: “Halloween Candy Bag”
  Time: 9:30 a.m. – Noon
  Cost: $25 (plus additional materials; list provided at the Arts and Crafts Center)


This is the only project I am totally revamping.  I love this bag and so do my children, but there was much frustration last year with my beginning sewing students with all of the gathering that is required for the bag.  The pattern for this bag will be available on my Etsy site.  The NEW and improved Halloween candy bag will be a simpler design and making its debut in the Arts and Crafts window very soon!


Thursday, August 4, 2011

A Man and His Bag

I have wanted to make a "Man Bag" for awhile now, and Hubby's impending trip back to the Land of the Brave was just the kind of deadline I needed to actually get something done.  Designed to hold a Netbook or iPad, the prototype of the Man Bag is made from an up-cycled pair of pants and lined with an up-cycled dress shirt, sewn in contrasting red thread.  
 Pant side seams were used to add visual interest and the back pocket was used to add...well more pockets.
 The front flap covers a zippered front pocket.  For the prototype I used a zippered pocket straight off the pants.  I will include a front zippered pocket in future designs.
 The top also zips closed to completely conceal the Netbook, Kindle, iPod, pens, and passport on the inside....until someone unzips it, takes a picture, and posts it on her blog.  There are two pockets, two pen/pencil pockets and a padded divider on the inside.
 The prototype is padded to protect the electronics on the inside, however in future designs there will be some modifications to accommodate top stitching around the opening to the bag.  The top of the prototype would not fit under the presser foot of the sewing machine.
And He's OFF!  If you think he looks a little tired it's because the photo was taken at 6AM, and he's already been awake for 2 hours!  If you see him at GEN-CON ask him about his dice pocket.

Friday, July 29, 2011

Canning Tomatoes

Every Summer, since our arrival in Italy, my neighbor asks if I would like her help making "salsa."  Salsa in this case means tomato sauce.  Each year I am overjoyed that she helps me with such an undertaking.  This year we started with 4 crates of tomatoes.  I grow tomatoes in my garden, but I don't have the volume or variety she likes to use for sauce.  So this year, like every other year, her husband purchased suitable tomatoes at a local market for the "salsa."      
The process begins early in the morning, before it is too hot outside, with washing the tomatoes.  Once all the little red jewels are clean, they are sliced in halves or quarters.  
Next, the tomatoes are put into larges pots with a cup or two of water and a teaspoon or so of salt.  The pots are placed on the stove and cooked until they have boiled for a few minutes (3 to5).  The tomatoes must be stirred often to prevent any from sticking to the bottom of the pan and scorching.


After they have boiled for a few minutes, the liquid is drained off of the tomatoes.  
The set up for turning the tomatoes to sauce requires a contraption for removing peels and seeds, a bowl to catch the peels and seeds, a bowl to catch the sauce, and a "C" clamp to hold it all down.  The boiled tomatoes are cranked through on the first run, and then the peels and seeds are run through a second time to remove any of the lingering juicy pulp.   A little sprinkling of sugar can be added at this point, though my mother insists this is not a good idea.

Next, the sauce is put into the jars using a funnel, or "imbuto" in Italiano.  I used mostly 250ml jars, with a few pint jars.  A pint is just a little smaller than 250ml.  
Next, the tops are covered in thin plastic.  I inquired about the reason for this step, and was told to do it because that is the way she was taught to do it.  A word of caution on this step...one year I used American plastic wrap, which was apparently too thick, and ended up with all of the jars coming unsealed around December and all of the remaining sauce rotting....sad, sad, sad...very sad year.  Last year I refused to do this step and everything turned out fine, this year my arm was twisted into doing it again...this time with Italian plastic wrap.  
After the lids are screwed very tightly onto the jars the jars are placed upside down, just to make sure nothing seeps out.
Then the jars are placed into very large pots with about 1 inch of water covering the lids.  A lid is placed on top of the pot, the fire is turned up as high as it will go, and you wait, and wait, and wait for the water to boil, trying to keep in mind that "a watched pot never boils."  After the water has reached a boil, set the timer for 30 minutes.  When the jars have boiled for 30 minutes the pot is removed from the stove and sits overnight.
The next day the jars are removed from the water.  The water is used to water flowers, and the jars are arranged in a precarious tower for photos.  45 jars are featured in this picture. Check each jar to make sure the lid is sealed.  A sealed lid will not "click" when center is pressed down.  If any of the jars did not seal they can be placed in the refrigerator and used sooner rather than later.
After the tower has been disassembled and the jars are tucked safely away, a photo editing program may be used to create super-punny pictures like...the Leaning Tower of Pomodoro.